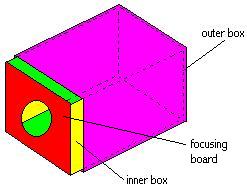
Step 5: The Focusing Board
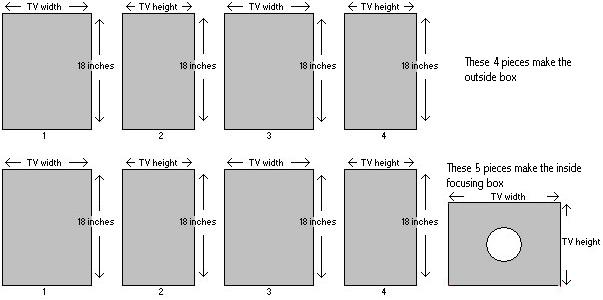
Now we will cut the "focusing board." This panel matches your screen's height and width and will serve as the front face for an internal box that slides snugly into the outer enclosure.
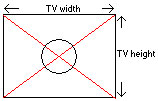
Step 6: Centering and Cutting the Lens Hole
On your focusing board, draw a large "X" by connecting opposite corners with a straight line. This find the exact center. Place your Fresnel lens over the center, trace its circular outline, and cut out the hole.


Step 7: The Inner Box & Painting
Create the inner box following the same logic as Step 2, but make it 9 inches deep and slightly smaller in girth so it can slide inside the main enclosure. Now, paint the interior of all panels matte black. This is critical for preventing light bleed and ensuring a clear projection.
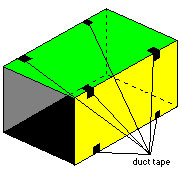
Step 8: Assembly
Once the paint is completely dry, use duct tape to assemble the panels into their box shapes. Ensure the black-painted sides are on the inside. You should end up with two separate box structures: the main enclosure and the smaller inner focusing box.